There is an endless list of projects that you can try with a Raspberry Pi, however, my favorite one is the Home Automation Project. For just a few bucks and with the help of the great OpenHab community, you can automate everything around the house. Today I am going to explain to you how to install openhabian on a raspberry pi.
So…What do we Need to Install Openhabian?
Raspberry Pi 3: This will be the brain of our home automation system. If you already have one that you can recycle for this project it will be perfect, preferably version 2 or 3.
Power Supply: We all have a bunch of USB cables wandering around the house and they will all do the job. How long will it last working? that is a whole different issue. An insufficient or unstable power supply can cause malfunction and SD corruption. Every model of Raspberry Pi has different power requirements, for example, the RPI3 needs a micro USB power supply with 5V and at least 2.5 Amps. Don’t go cheap on this, remember that your system has to be up and running 24/7.
SD Card:
-
- Capacity: OpenHabian is based on Raspbian Lite which requires 4GB, however, there will not be much of a difference in terms of price compared to 8 or 16GB so I would throw a few more bytes into it. We want our home automation project to grow bigger in the future.
- SD Class: Again, the SD cards are now dirt cheap, and Class 10 will have bbetter writing performance. It is not a hard requirement though.
- SD Card type: The card type depends on the version of Raspberry Pi that you got. RPI2 and RPi3 use Micro SD Card while RPI1 uses regular size.
Install OpenHabian on a Raspberry Pi
You can flash any distribution on a Raspberry Pi and then install OpenHab manually, however, if you install openhabian you will save a great deal of time. It is an image maintained by the OpenHab community with everything preconfigured to have the system working within minutes.
If you don´t want read and prefer to watch a video, I am going to leave you here a link to a video from BK Hobby that will walk you through the installation process. You can also keep reading the post, it is a short process.
Step 1: Download the latest version of OpenHabian
The first step to install openhabian is to get the latest image from the official repository of the project. At the time I was writing the post, the latest version was v1.3.
The link will be found in the Download section, towards the center of the page. You will see a few options, make sure you download the one that starts with openhabianpi-raspbian*.
Step 2: Download and Install Etcher
Get the latest version of Etcher on their website. We will use it to flash the OpenHabian image on our SD Card. There are tons of applications that can do this, but I like this one because it includes a verification step at the end of the process. The installation is pretty simple but if you have any question post some comments. I am happy to add more info if needed.
Step 3: Write the Image on the SD Card
We are ready to roll, unpack the image that you downloaded in step 1 using winrar or 7-zip and open Etcher.
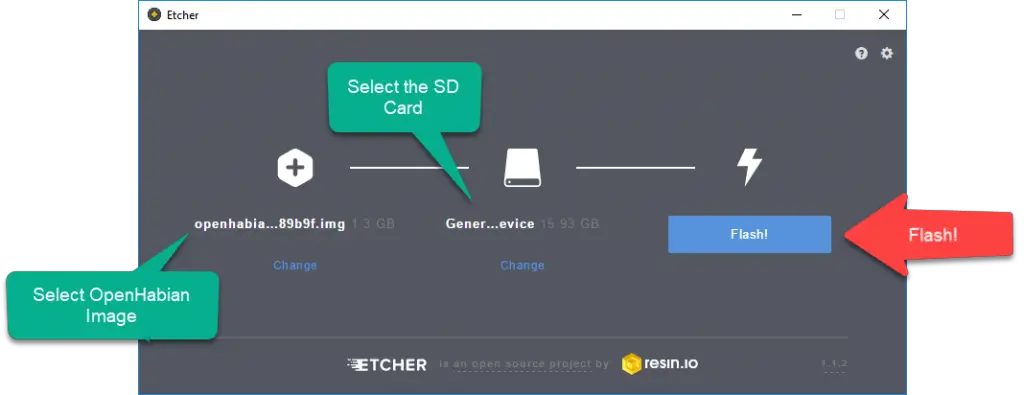
Click on Flash and Etcher will start writing the OpenHabian image on your SD Card. The process will take a couple of minutes, depending on the computer and the card reader that you have.
Step 4: Install Openhabian on the Pi
Let’s extract the SD Card from our computer and start the installation process. We are almost done.
- First of All, connect the Raspberry Pi to the internet using a network cable.
- Insert the SD Card into the slot of the Raspberry Pi.
- Connect the power supply.
- Grab some coffee and go to Youtube to watch cat videos (or whatever your preference might be) until the installation is done. It will take 30 to 40 minutes depending mostly on your internet connection.
Step 5: Start Using OpenHab
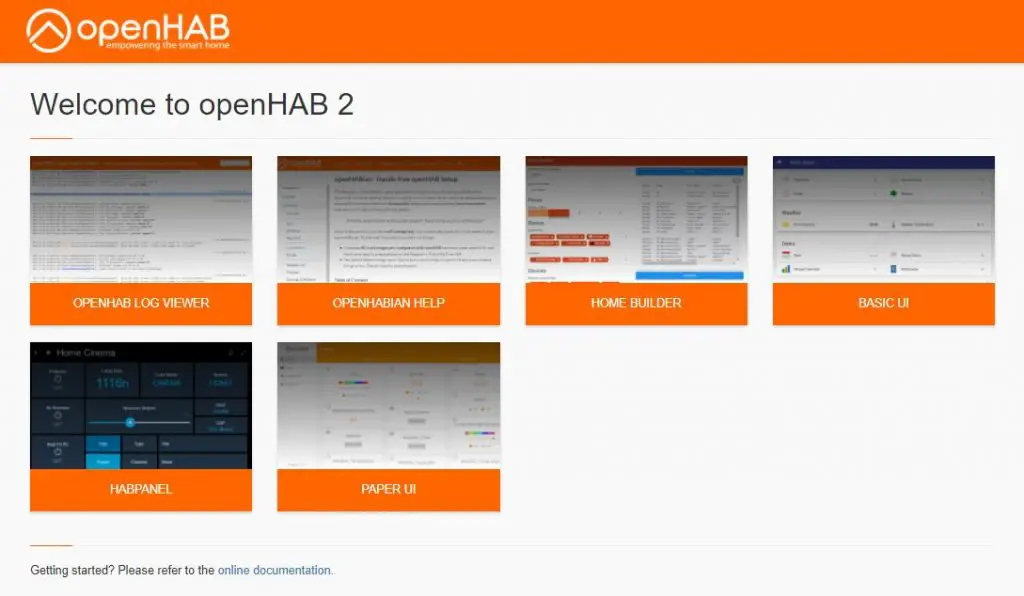
After 30 minutes, the magic should already be done and we can finish the installation using the Web UI. The following link opens the Web UI http://openhabianpi:8080/ . If the page doesn’t load give it another 10 minutes before start with the plan B (Check the end of the post for this).
Eureka!

Too many options? No worries, I will break them down for you.
Simple Package: It is intended for users that want to use the UI to configure everything. It is a good option if don’t feel comfortable editing configuration files, although remember that you will not be able to get away without editing a few settings in the files.
Standard Package: This is probably the recommended option for 90% of the users. It includes all the relevant components to get us going and If it doesn’t cover your expectations you can always install more add-ons later.
Expert Package: If you are following this tutorial, your version will be Openhab2. The expert package is mostly for people transitioning from OpenHab 1.x. to Openhab2. It also includes a few additional interesting tools like the REST API Documentation.
Demo Package: This is only for demonstration purposes, as the name suggests. I don’t see any advantage on this one unless you only want to play around.
In conclusion, the standard package has everything that you will need for your first steps, and if it doesn’t just install it later.

After a few minutes, OpenHab is installed and we can start using it! One of the best things about the project is its documentation. Swing by their website and start learning the fundamentals.
Change the Passwords
You can skip this step if you want to, the installation is done and you are ready to start using the system, however, it is highly recommended to change the passwords right away.
- Remote to your Raspberry Pi using SSH. User and Password openhabian/openhabian. SSH? doesn’t ring a bell? No worries. It is kind of out of the scope for this article but the blog ThePi.io has a great tutorial that will bring you up to speed in a few minutes. You can skip the first step since the SSH access is active by default in OpenHabian. You will be able to access using the following credentials:
Host: openhabianpi
User: openhabian
Password: openhabian
2. Type sudo openhabian-config and provide the default password, openhabian.
|
1 |
sudo openhabian-config |
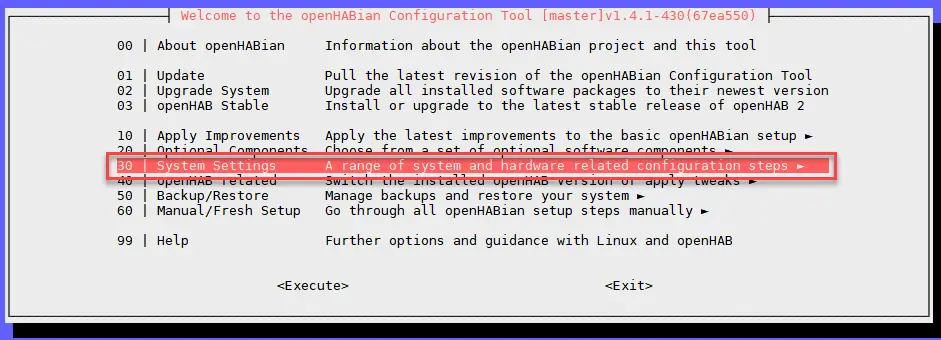
3. In the main screen, select System Settings.
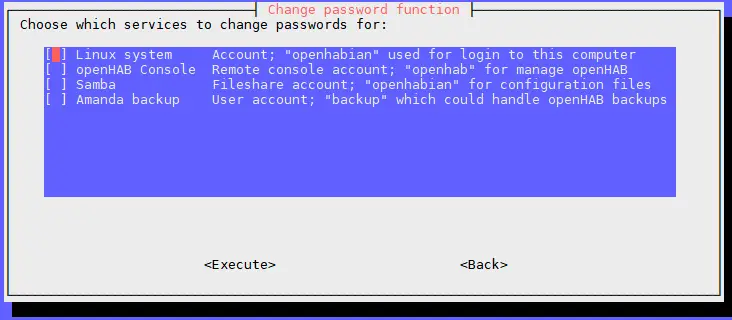
4. Go to Change Passwords.
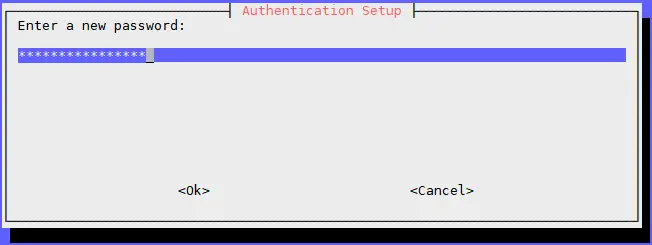
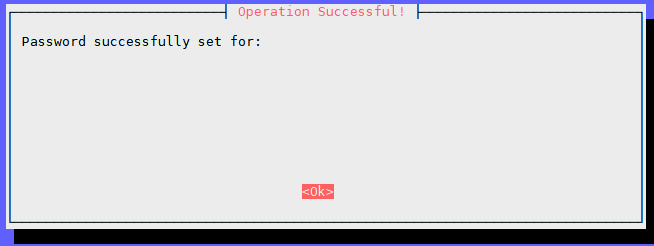
5. Change the 3 passwords one by one.
You are all set to start playing around. I will keep adding more tutorials so stay tuned!
Troubleshooting
It’s been more than 40 minutes and the Web UI doesn’t open…
 Most of the installations go just fine, but let’s say today is not your lucky day…what can you do?
- If your Raspberry Pi is connected to a screen you can probably see that something went wrong.
- If that is not the case, we can get an idea of what is going on by remoting to the Pi using SSH. When you log in, if the installation didn’t finish successfully, Openhabian will show you the installation log. You will probably see something like this.
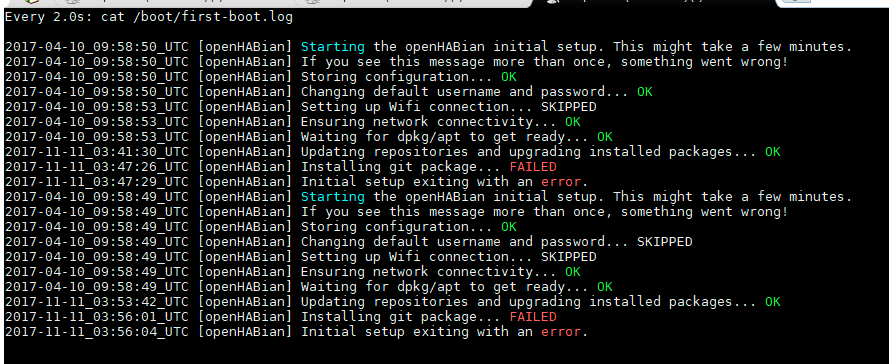
Most of the times, the issues that you will have during the installation are related to 3 things:
- Poor Power Supply.
- Broken SD Card.
- Broken or unreachable repositories.
How do we solve it?
- Option A: It solves the issue most of the times for me.
- Try a different power supply/USB cable.
- Download OpenHabian and flash the SD card again. Start a fresh installation.
- Option B: Install Raspbian Lite and install openhabian manually. It sounds horrible but all the steps are pseudo-automated. You can check a tutorial here.


