In this DIY tutorial, we are going to setup esp32 based CCTV and Face Recognition system, And how to do it with face recognition by building an IP surveillance CCTV with the ESP32-CAM module. ESP32 can actually broadcast the video streaming on the webserver over Wi-Fi with very good FPS, FPS means it can produce High frame Per second and the really good this about this project that we can access this product with any device from your network that comes with an internet browser, for example, laptop, smartphones, and any other devices which comes with Wi-Fi and internet browser. And if we talk about the Face Recognition system, we can use this feature After accessing the video stream from the network, we will perform face recognition.
ESP32-CAM
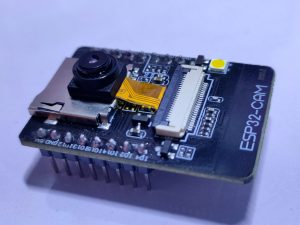
First of all, we will take a look at the ESP32, you may what is esp32 right? ESp32 Basically is a series of low-power, low-cost system on a chip microcontroller, yes you read it well, it’s really low cost and it can purchase it from china under 7$, and Esp32 cam is also can be purchase under 10$, ESP32 chip comes with Wi-Fi dual-mode Bluetooth, dual-mode means it can also come with both types of Bluetooth, Bluetooth classic and Bluetooth low energy.The Esp32 Itself comes with a dual-core or single Tensilica Xtensa LX6 microprocessor with a clock rate of up to 250mhz. Esp32 Specially engineered for mobile devices, wearable electronics, and IoT applications, Esp32 also having an ultra-low-power consumption feature through power-saving feature fine resolution by dynamic power scaling.
This means esp32-Cam also comes with these same features. Not only that Esp32-Cam also comes with a camera and a micro SD slot. And we can insert the memory card in order to save the picture or we can collect the data from micro sd cards for different projects. The ESP32-CAM is a really tiny Esp32 based chip camera module that costs approximately from 5$ to 10$ from aliexpress.com. In this smartboard, we got an OV2640 camera and several GPIOs to connect peripherals sensors, LCD, and many other open-source electronics stuff. This Esp32-CAM module also features a microSD card slot which is mention above as well and it can be beneficial for many other projects to store images taken from the camera or to store files for cloud storage on the network. It comes with a 2MP camera module with a good FPS rate.
FTDI programmer RS232
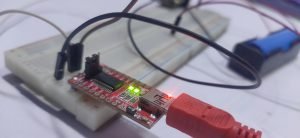
This is a simple programmer that help us to program different type of microcontroller, this is also known as USB to Serial convertor. Future Technology Devices International and its commonly known as FTDI, its actually a Scottish private company that produces semiconductor devices, and they have a specialty in USB technology.
FTDI Develop an application-specific integrated circuit (ASIC) services. This Company develops, RS232 or TTL Serial transmission to USB Signal in order to allow support for legacy devices with modern computers.
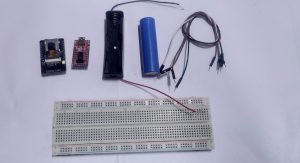
Collect the hardware requirements:
- Any 3.3 + volt battery (For powering up the module)
- ESP32-CAM with OV2640
- Female-to-female jumper cables
- FTDI programmer
Collect the Software Requirements
- Arduino IDE
- Configure your ESP32 Board in Arduino IDE
Wiring
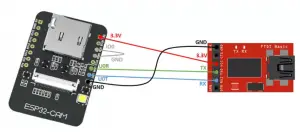
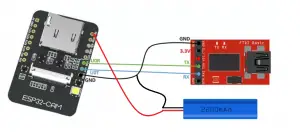
In order to upload the code, wire up everything as mention below in the fritzing diagram, we are using FTDI Controller to for uploading the code to the ESP-CAM from your computer. Also this is very important after uploading the code just remove the 3.3volt pin and connect with external power supply.
FTDI——–ESP32-CAM
TX———-RX
RX———-TX
3.3v——–3.3v
GND——-GND
Done your wiring? Now let’s move to the Sketch uploading section, Follow the steps below in order to configure the Arduino IDE for your Esp32-CAM.
Configure your Arduino IDE for Esp32-cam board
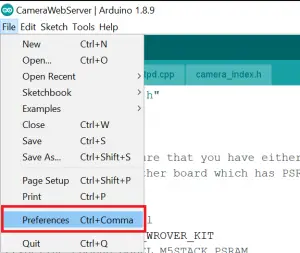
In order to configure the Esp32-CAM with your Arduino IDE, run the “Arduino IDE”,
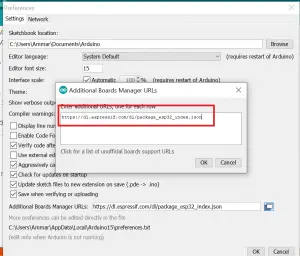
Go to “File>Preferences”, add the additional URL as shown.
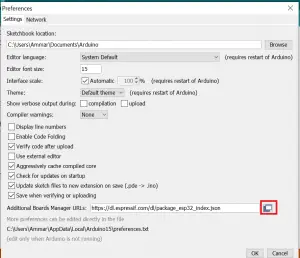
https://dl.espressif.com/dl/package_esp32_index.json
After Adding the Additional URL, Just Go to “Tools”> “Board:” > “Board Manager”.
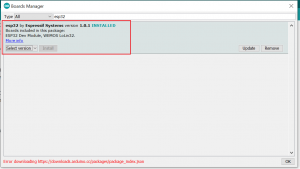
Search “ESP32” on the Search bar of the window and install the esp32 by Espressif Systems version 1.0.1. (1.0.1 This is important else your code will not work)
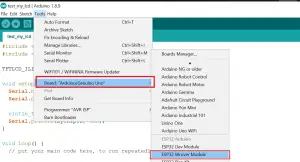
After adding the Esp32 Board Just click on “Tools”> “Board:” and click on “Esp32 Wrover Module”.
Select the Esp32 Wrover Module” from the “Board:”
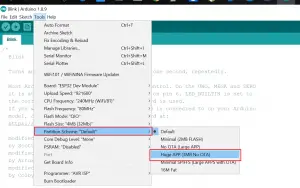
Click on tools from the menu visit “Partition Scheme” and choose “Huge App(3MB No OTA)”
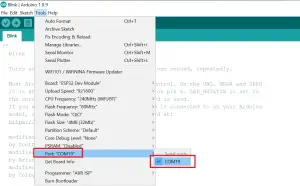
After the above step, again go to “Tools”> “Port” > Select Port.
Upload source Code
For Uploading the code, follow the steps below.
Now, just Go to “Files” > “Examples”> “Esp32”> “Camera”> “CameraWebServer”
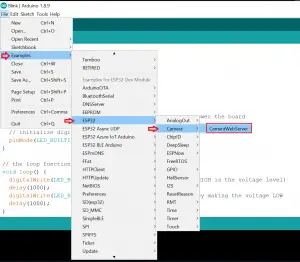
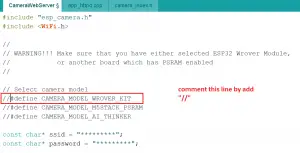
After opening the “camerawebserver” example, edit the example source code as shown below in the figures.
#define CAMERA_MODEL_WROVER_KIT
Comment this line by adding “//”.
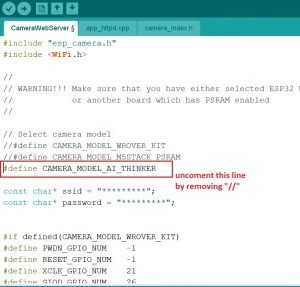

#define CAMERA_MODEL_AI_THINKER
Uncomment this line by removing “//”.
Add your Wi-Fi information as mention in the figure below.
After making these changes, upload the code by pressing
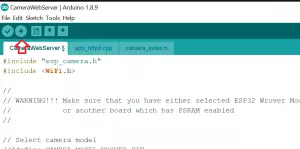
“CTRL + U”. Or click on this button.
NOTE:
in order to upload the code, this is very important to set the GPIO 0 pin to LOW because this will set your esp32 into flash mode. So GPIO 0 should be connected with GND on the esp32 module; hit the reset button, after this, your Esp32 goes in the flash mode so that we can upload the code.
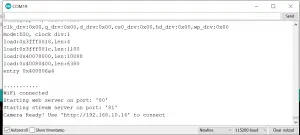
And after uploading the code, remove the GPIO 0 Pin from Ground, and press the reset button. Now open your serial monitor and that should display the IP address of your Esp32-CAM as shown below in the image.
Important:
For better performance use any 3.3volt lithium battery or good power source with the Esp32-Cam module. After uploading the code, disconnect the 3.3volt supply from FTDI and connect the external power source, or else the camera module will not perform well. Follow the below diagram.
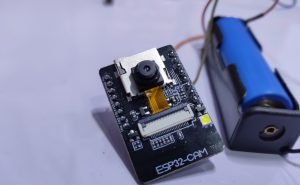
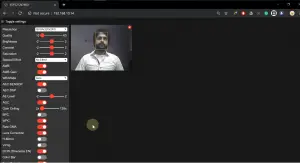
Visit the camera IP address and you will see something like,” check the image below” Set the resolution and then click on start streaming.
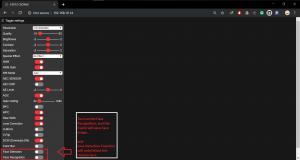
Turn on the Face Recognition from the left side menu, and the Esp32 will start to detect human faces.
For using the Face Recognition Function always use CIF Resolution.
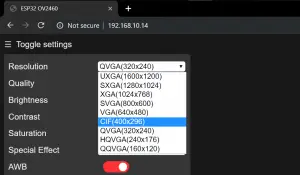
Now, we can do face recognition and face detection. To start, you have to enroll in a new face. Esp32-Cam will then save the user’s face and then it should detect that face later on. Check the video demo below:
